Showing posts with label brilliant ideas. Show all posts

Monday, February 28, 2011

Mise, Please

In the past few years as a housewife, I think I have grown to become a pretty competent little home cook. I can chop like a champ, whip like a whiz, and  puree like a pro. The one thing that took the longest to master, though, and that I still mess up every now and then, is timing everything so that it all is finished at the same time. Inevitably, the salmon sits out getting cold or, worse, overcooked, while I wait for the potatoes to bake through.
One strategy I have learned to combat this, is using the technique of mise en place. "Mise en place" is french for "put in place" and refers to "having all the ingredients necessary for a dish prepared and ready to combine up to the point of cooking" (thanks, Epicurious). Like in a cooking show, when the host has everything all chopped and measured in little bowls in front of them, and all they have to do is throw them together. Haven't you always wished you could cook like that? Well, you can!

When you are cooking dinner, even just for yourself, don't just flip on the stove and dive right in. Slow down, take stock of what you'll need, and get everything organized in front of you, so it's all easily reached and ready to go at just the right moment. Dice the herbs, slice the veggies, and measure all the spices into a bowl. Because I work from home, sometimes I will chop the onions or slice the carrots in the middle of the day, and cover and set them aside for dinner. If you invest in a set of small dishes, like these  Pyrex containers with lids, $14, from Amazon.com, you can take things right from the fridge to the stove. You can even lay out the pots and pans you will be using. It may seem like this will produce an unnecessary number of extra dishes, but if you are smart, and combine ingredients that can be added at the same time, and reuse bowls, you'll be surprised at how much work it saves you in the long run. I keep a small bowl of chopped parsley in my fridge at all times- I pull it out and use it over the course of a week, saving myself precious herb-chopping time every week.

You'll be amazed at how much more fun cooking is when you aren't scrambling to mince the garlic before the sauce burns on the stove- you will truly feel like the star of your own cooking show. It's up to you whether you want to narrate your actions into an imaginary camera as you go, like I do. Bam!


Top photo: Ranger Mike Designs

Wednesday, February 2, 2011

Rock the Votive (with Guest Blogger Lea)

Out of the blue this week, I got an email from my childhood friend, Lea (who you might remember from this post or this post), with a pretty great blog post that she just whipped up 'cause she felt like it. I have been busybusybusy (so what else is new?) and this little unexpected surprise arrived in the nick of time. Plus, we're only a couple weeks away from Valentine's Day, and who couldn't use a little cheap, romantic candlelight in their lives? So bust out those gross, burnt, waxy, old glass votive candle holders you were going to throw away (or pick some used ones up for next-to-nothing at a thrift shop- they look great mixed and matched en masse), and give them a new lease on light (see what I did there?) PLUS: check in tomorrow to see a few unexpected uses Lea has found for her votives (including one brilliant craft project I wish I'd thought of).  It'll be all the candle you can handle.  Thanks, Lea!

 Every year, before the holidays, starting from when I was a child, I have made it my job to clean all of the votive candle holders in the house and get them looking fresh and new and ready for the season. I've always liked this job because it's a big mess/project/production and I get to experiment with different ways to remove candle wax. And when I was finished I loved the atmosphere that candles brought to the house.
I tried many different approaches: Melting off the wax in hot water on the stove (what a mess...), putting the candle holders in the freezer and then picking off the wax (works OK for big pieces of wax but does not leave a clean look), scraping the wax off with a butter knife or fingernails (ouch!) or razor blades, or using hot water from the faucet to soften the wax. All of these approaches were difficult, time consuming, and always left me with a terrible waxy mess to clean up afterward.
 I was married a little over a year ago and I wanted to have a candlelit dinner as part of the celebration. Lil (a.k.a A Charmed Wife)'s mom had 50+ glass votives left over from Lil's brother's wedding that she said I could have. I was up for the challenge of cleaning them, but I knew I needed a better method.
What I came up with put all of my previous years of work to shame! It is very simple and effective (at least for glass votives) and best of all... it leaves no mess! Here's what you do.

Step 1: Put the oven on VERY low (100 to 150 degrees F) because you don't want an oven fire, and place all of your votives on an old baking sheet. (note: I did once cause an oven fire in my mother's oven when I was trying to make new candles from old ones and beeswax crayons... The oven was on WAY to high but luckily there was a fire extinguisher nearby... what a mess... sorry mom, you were so patient with me, I love you).

Step 2: Once they are warm and you can see some melted wax, remove only one of the votives from the oven with an old oven mitt or pot-holder (take care not to burn yourself) and pour the melted wax into an open paper bag that you have already set in the trash. 

Step 3: Next use paper towels or cut up old t-shirts or paper napkins (I hold on to unused takeout napkins and keep them in a drawer -just like my mother does- so I can use them for dirty jobs such as this) to wipe away the left over wax and any soot or dirt and !VOILA! you are done!

4) Repeat for all of your votives, throwing away your wiper into your paper bag when it gets to much wax on it. If any wax got on your baking sheet you can also just wipe it of:) Don't forget to turn off the oven, something I always need to remind myself to do, or else my husband reminds me with a worried look in his eye.

5) After this process, your votives will be very clean and ready for new candles. If you want them extra sparkly or if you want to repurpose them (check in tomorrow for some novel ideas), just wash them like dishes.  I hope this gives you a motive for cleaning your votives!


Monday, January 10, 2011

Sweater Weather

I grew up in California, and, in case you were wondering, what the Beach Boys and Katy Perry have told you is true about us California girls.  I was tan and wore flip-flops, shorts and bikinis all year. There was nary a boot, turtleneck, or scarf to be found within 100 miles of my closet. So, needless to say, when I moved to Boston for college, I was more than a little out to lunch and wildly unprepared for winter. Suffice it to say, I brought twelve sarongs with me, and zero coats.
The first day it really got cold that fall, I had to wear all of my clothes at once in order to keep from freezing on my way to the dining hall. Over the course of that year, I picked up a thing or two in the classroom, but what I mostly acquired was a collection of sweaters, which the intervening years of my east-coast residence have only served to multiply. And, strangely, I have come to love sweaters. The problem with sweaters, though, is, unlike sarongs, you can't just throw them in the laundry. And, if you, um, glow like I do when the radiator kicks on, dry cleaning can get rather pricey. Luckily, after years of trial and error, I discovered a method for washing my wool and cashmere sweaters at home, which leaves them cleaner, fresher, and softer than dry cleaning.  Which is good, because I now pretty much wear a daily uniform of jeans and cute sweater from October until May. The rest of the time, I'm back in shorts and flip-flops. After all, you can take the girl out of California...

 Step 1: Fill your sink with hot or warm (you heard me!) water and a squirt of Dawn, or another gentle dishwashing liquid, and carefully place your sweater in it. Contrary to popular belief, hot water is not damaging to wool, but regular laundry detergent (even Woolite) and agitation ARE. So avoid the urge to swish or agitate the water once you have put the sweater in, and just let it soak until spots are dissolved. 
 Step 2: If your washing machine has a Delicates setting for "Rinse" and "Spin", you can move your sweater into the washer and use those two cycles to, well, rinse and spin it. If your washer doesn't do that, gently drain the soapy water in your sink, and refill the sink with warm water a few times until the sweater is rinsed. Then, carefully transfer the sweater to a dry towel and roll the towel until the sweater is just damp.
Step 3: Transfer the sweater to a dry towel, and lay it out flat, in the shape the sweater will be worn. Allow sweater to dry completely before folding and putting it away.  See- no sweat!

Thursday, December 30, 2010

Snow Jobs and Staycations

Oh boy, oh boy, oh boy. A lot sure has happened since the last time I posted, huh? First, I spent a week in New York City running around like a headless chicken buying and wrapping Christmas gifts, decorating and cleaning our apartment, cooking, buying booze, and getting organized for our holiday party, cleaning up from said party (it was a blast), packing for our two-week bi-coastal holiday tour, baking six raisin coffee cakes, and readying the apartment for our absence. Then, we loaded up the car, drove up to Boston, and spent Christmas Eve and Christmas cooking, shopping, putting up Christmas trees, eating, drinking, opening gifts and playing with them, and visiting with JM's family (we also saw The King's Speech-amazing- run, don't walk, to the theater. But I digress). Then, on Sunday, we packed up all our stuff and gifts, and got ready to fly to California, only to learn that there was a huge snowstorm coming, and there was no way we were getting out. What followed was a circus of scrambling to re-think and re-book our plans ("Do you have any flights from Providence to Las Vegas?"), set to the mellifluous tones of 12 continuous hours of airline customer-service hold music. Somewhere in the madness, my in-laws' golden retriever ate one of the aforementioned raisin coffee cakes whole, and had to be driven through the blizzard to the animal hospital (raisins are potentially toxic to dogs, as you know if you read this, but he's fine now). Then, yesterday, as we carefully drove our way back to New York City (in a rare and precious rental car) to make our flights, we got word that they had been canceled again.  So, we decided that sometimes you can't fight fate, that we weren't going anywhere, and we settled back in to our own cozy apartment, from which I am writing this.


But all is not lost! If we can't have a vacation, at least we can have a STAYcation, and enjoy ourselves while we are holed up. We plan to take long walks in the Park, read our books by the fireplace, go to the movies, play board games, get drinks at fancy hotels, and generally try to ignore/put off non-pressing responsibilities until later. So for those of you who can't get out of town, be it for meteorological reasons, or logistical or financial ones, here are some tips for the perfect staycation. As a bonus, you might actually end up relaxed at the end of it.


1. Plan Ahead
he real trick to a successful staycation is getting yourself to treat it like a real vacation. Obviously, we didn't really have the luxury of doing this ourselves, but, if you can, set beginning and end dates for your staycation. Let your office know you won't be in or available during that time. Resist the urge to say, "I'll just be at home, so if you really need me..." Then, start scheduling things you want to do for each day. If you really want to unplug, schedule a cleaner to come in on the last day of your staycation, to do all the laundry and dishes, and change the sheets. That way you can completely ignore your chores, guilt-free. 


2. Do Research
You may think you know everything these is to do in your own town, but do some research on the internet, or in guidebooks for fun activities. You may be surprised by how many local tourism attractions you have never seen or done.  I've lived in New York City for seven years, and the list of museums, art galleries, tall buildings, boat and walking tours I've never seen or been on is far, far, longer than the one of those I have. Not to mention all of the cool shops, restaurants and neighborhoods I haven't yet explored. Like pretty much all of Brooklyn.


3. Do Activities
Sitting around the house watching TV does not a memorable vacation make (no matter how much you want to catch up on the last season of Dexter). To make a staycation work, you have to get out of the house. Think of what you would do on your ideal day (other than watching TV)- be it ice skating, skydiving, or reading in a coffee shop, and find out where to do it (if you have kids, make sure to ask them what they would like to do, too, and incorporate it into the plan). Buy tickets to a local theater production, amusement park, sporting event, festival or concert. Make reservations at restaurants and write out a plan and schedule for each day, and then follow it!


4. Be Nice To Yourself
Schedule a massage, spa day, or manicure and pedicure one day of your break. Go to that yoga class you've been wanting to try but never had the time for. If you eat out and order take-out during your break (as you should, unless grocery shopping and cooking are your idea of a fun vacation activity), just be mindful of not overindulging- a dessert or two is fine, but at the end of your vacation, you should aim to feel well rested, healthy, and good about yourself.


Stay classy, everyone!

Wednesday, December 15, 2010

In The Fold

Those of you who have read every post I've written since I started blogging 2+ years ago (Hi Mom!) may have wondered to yourselves why I have gone this long without ever doing a post on one of housekeeping's greatest mysteries and challenges- how to fold a fitted sheet. Well, the truth is that nobody's good at everything, and this is a skill I can honestly say I don't have. In the past, even when I have tried my hardest at neatly folding, my fitted sheets typically come out looking like some giant's used hankie. But that may be because I was doing it wrong! Check out this video my friend, Irene, alerted me to, via kottke.org. This lady takes the sheet and turns it into a perfect, flat rectangle, like some kind of sweet, nurturing magician, set to gentle guitar chords.  I could seriously watch this video all day. And maybe after I watch it a few more times, I'll actually go into my linen closet and attempt it. Or maybe I'll just have a cup of tea.


For those who prefer written instruction, here are the basic steps she takes (although, to use an idiom I think I just made up, "no one ever learned to walk by reading a book!").

Note: Your sheet will end up with much fewer wrinkles if you do this when it's still warm out of the dryer.

1. Take the fitted sheet, inside-out and place one hand in each of two of the pockets, along one of the long sides. Bring your hands together, and transfer the pocket on one hand on top of the other, so that both pockets are over one hand.

2. Using your free hand, follow the edge of the sheet down to the next loose pocket. Bring that up and tuck it inside the two pockets that are already folded together. Repeat with the fourth pocket so that all of them are nested together.

3. Still holding the sheet by it's corners, straighten any folds and the edges, so that the sheet forms a rough rectangle. Lie the sheet down on a flat surface and smooth further.

4. Fold the sheet in thirds width-wise, and then in thirds again lengthwise. If it turns out badly, just watch the nice lady do it again.

Tuesday, December 14, 2010

Hic Town

One of my college roommates/besties just had a baby girl named Kyla, who is maybe the cutest thing going in the under-two-week set. While I was over there gaping and marveling at her teeny little fingernails and eyelashes, she did something amazing. (No, she didn't talk. Seriously, get real). She hiccuped. And her mom (weird, my friend is a mom) said that she has had hiccups a lot (I mean, a lot for an 8-day old), and that the doctor said that some people are just more prone to them than others. And when I heard that, my affection and sense of loyalty to this little squirmer - which were already pretty high for someone I just met - shot off the charts, because suddenly I knew that she and I had something in common (I mean, in addition to our favorite hobbies- sleeping and eating). Because, I am ALSO a hiccup-afflicted individual! And before you wiseacres pipe in, it's not just because I drink a lot of beer, so shut it- I've been hiccuping abnormally oftenly since I was but a tiny tot myself. In fact, my mom says I got them moments after I emerged from the womb, although I can't verify that information myself, because I don't remember that day very clearly. I was probably too distracted by the hiccups to take much notice of anything.

Anyway, all of this is to say that over the intervening years, I have become a bit of an expert on the hiccups- what they are, why they happen, and how to get rid of them, as I suspect my friend's poor baby will have to do, as well, as a fellow sufferer, once she is no longer a baby. So, as a gift to this wee human (who needs another bib?), I decided to put down the veritable hiccup encyclopedia that I have in my brain for posterity.  I give you:

Everything You Ever Wanted to Know About the Hiccups if You Are a Baby or Adult Who Gets Hiccups A Lot


What Are Hiccups?
Hiccups, or hiccoughs, if you like to spell things the pretentious way, are involuntary spasms of the diaphragm or esophagus caused by a reflex triggered by the vagus nerve. You don't really need to know that, except if you are ever on a game show, and they ask you that specific question (if that happens, you should probably send me some of the money you win- it's only fair). Also, it's good to understand that for when I reference the vagus nerve in a pun the next paragraph.


What Causes Them?

There are many ways of overstimulating or irritating the vagus nerve, triggering hiccups. You can do it by eating too fast, or too much, or spicy foods, by swallowing air, taking some medications, laughing a lot, or drinking alcohol or carbonated beverages- pretty much anything fun). In other words, what happens in vagus does not stay in vagus. (That joke was so worth it). So, theoretically, you could try to avoid getting the hiccups by eating small, bland meals very slowly, accompanied by flat, non-alcoholic beverages for the rest of your life. Or you can just find yourself a sure-fire, never-fail, hiccup cure, and be happy. Here's what works for me.


How to Cure Hiccups
The way to cure hiccups is to essentially "reset" the vagus nerve by stimulating it in another way. Here are some methods that work:

1. Hold Your Breath: Interrupting your breathing patterns typically will end your hiccups. The best way I've found is to take in a deep breath and hold it as long as you can, while swallowing a few times. Hold your breath until you turn red in the face, and then a few seconds after that.


2. Drink Water Upside-Down: This is the cure that works the most consistently for me. Unfortunately, it also is the most ridiculous-looking one. Fill a glass of water to the brim, plant your feet a few feet apart, bend at the waist, and drink from the wrong side of the glass.


3. Sugar Overload- Put a tablespoon of sugar or a sugar cube in your mouth and let it dissolve on your tongue. The extreme sweetness will jar your nerves.


4. Pull On Your Tongue- No idea why this works, but it does- stick out your tongue, grab it with your fingers, and pull it outward for a few seconds.


5. Get Tickled- Seriously, if the thought doesn't make you super uncomfortable, ask someone to tickle you- it will make the hiccups disappear. Personally, I'd rather drink water upside-down.


6. Take an Antacid- Antacids containing magnesium (Rolaids, Milk of Magnesia) can help calm the nerves, almost instantly. 


"Cures" That Aren't Worth It
Sadly, because everyone and their mom has a favorite hiccups cure, there are a lot of terrible ones floating around out there. These ones might work, but just don't seem worth the effort, really. 


1. Drink Vinegar- Um, gross. Also, all that acid can't be good for your teeth.

2. Get Scared- Seriously, have you ever seen this work? There's nothing scary about your friend saying "boo" when you're expecting it.

3. Stand On Your Head: Oh, for Pete's sake. What's more inconvenient- finding a place to safely stand on your head without flashing the other bar patrons, or having the hiccups for a few minutes? (Kyla, honey, Aunt Lily will explain what "flashing" and "bars" are when you're a little older).

One final note: if your hiccups last longer than a couple hours, or are impeding your ability to eat or sleep, stop reading blogs, and go see a medical professional.

Friday, December 10, 2010

Friday Styles: A New Spin On Things

There aren't many things in life that I like as much now as I did when I was twelve. For instance, I no longer listen to the Backstreet Boys on repeat, I don't have a crush on any of my older brother's friends (unless you consider my husband his friend), I doubt I would watch TRL, Dawson's Creek or Party of Five, anymore, even if they were still on the air, and I've finally accepted that I am not someone who should have bangs. But if I had to hang out with my twelve-year-old self for an afternoon, I know exactly what we could do that we would both enjoy: a drug store shopping spree. Ever since I started getting an allowance, I have taken a tremendous, unexplainable pleasure in shopping at the pharmacy. I love the cosmetics aisle, I love the non-perishable food aisle (pretzel buckets!), I love the home-improvement section, the greeting cards and magazines, the school supplies... I could honestly spend hours browsing the aisles of the drug store. And, while I occasionally have rung up some whopper bills, I usually escape for under $30- try to have that much fun for $30 at the mall!  I couldn't even take my tweener alter-ego to see the Justin Bieber movie for that.
One of my favorite things about the drug store is how often to find something wonderful that you didn't know you needed, nay, didn't even know existed, until you spot it on the shelf. On a recent cold Sunday, I ducked into my local Duane Reade to pick up some necessity I had run out of, and found myself in that familiar happy place, wandering up the aisles checking out mustache trimmers and denture cream (neither of which I needed, thank you very much). I landed in the hair-care section, and that is when I discovered something that has become one of my favorite new products- the Goody Spin Pin, $5.99 for 2, from Amazon.com, or most major drug stores). I am (obviously) a sucker for anything that promises to make my life easier, and I was actually amazed at how well these things work (Goody claims they take the place of 20 bobby pins, and I believe it). All you do is form your hair into a knot or bun and twist the pins in, and miraculously they hold it. I have thick slippery hair that's cut in multiple layers and, if they work for me, they would work for anybody.  I feel like these are one of those things, like the Internet, or cell phones, or running water, that once you have, it would be hard to go back to your life before them. Which is why I would buy several sets for Preteen Lily.

Unfortunately, as miraculous as these things are, though, there isn't anything they can do about those terrible bangs.

Tuesday, December 7, 2010

Picture This

JM and I have lived in our "new" apartment for almost two and half years, now. In that time, I've painted every room, put up wallpaper and wood paneling, refinished the floors, and arranged and rearranged the furniture in every room at least twenty times. But, for some reason, we had not hung up hardly any of our artwork. We simply couldn't commit or agree on what should go where, so instead we left all our paintings and prints stacked in a corner of our kitchen, cluttering up our house as their frames got dinged and our walls stayed bare. It was madness, I tell you, madness. Finally, last weekend, we came to our collective senses, and decided that hanging artwork anywhere, even if it wasn't the perfectly right place, was better than the status quo of no artwork, nowhere.

One thing we agreed on was that our tiny guest room/office needed a serious artsy pick-me-up. But the room is so narrow, we were concerned that hanging anything on the main sidewalls would make it feel claustrophobic in there. The solution? Lots of pieces arranged on the smaller walls, all the way to the high ceiling (to emphasize the air up there).

Whenever you are hanging a bunch of artwork on one wall, it's important to play around with the arrangement to make sure it all fits together, and the proportions work in the space. A good way to do this, without committing to hammer and nail, is to cut out paper sheets the same size as each of your pieces of art. (We used newspaper, which works well, because it's readily available, free, and comes in big sheets. But if you go this route keep in mind you may have to Mr. Clean Magic Eraser some ink smudges off your walls when your done).  Make sure to label each paper with which piece it represents, and which way is "up"). Then, use masking or painter's tape (so your walls won't be damaged) to play around and arrange the paper pieces on your wall, until you are happy with the way they look and fit together.

Measure the length from the top of the frames to the hanging wires, and mark the distance on each sheet. Then you can simple hammer the hanging hook (I like this kind, $5.70 for 50 pieces, from Amazon.com) right through the paper, for perfect placement. Rip the paper away, throw the art up on the hooks, and voila! - perfectly spaced art. So much easier than rearranging the furniture.

Tuesday, November 30, 2010

The End of Static (and Stasis)

I know I've been gone for a while, lovers. Have you missed me as much as I've missed you?  I've been making excuses about being really busy lately, but, truthfully, I've always been busy, and somehow managed to pump out some marginally interesting posts on a fairly regular basis, anyway. So, now the real truth can be told - I've been taking a little bit of a mental break from the blog because I was suffering from a wicked case of writer's block. That fickle wench Creative Inspiration disappeared, leaving me alone and bereft staring at a blank computer screen. So I buried myself in other projects (so much to tell you about!) and let the old blogerooni simmer for a while, and finally my blogging mojo seems to have sidled it's way back to me. So consider this a bit of a renaissance, if you will.

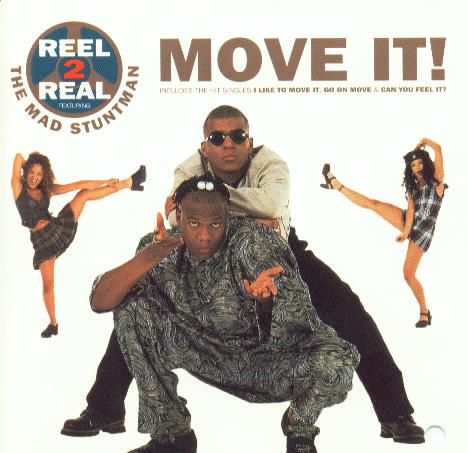
Now, after that dramatic and confessional intro, you might be expecting a real doozy of a post, that will revolutionize bathroom cleaning, or something, and change your perspective and the whole way you think about things and stuff. That's not going to happen. We're going to start the renaissance with just a little tip- a tiplet, if you will - and ease our way back in. After all, we don't want to scare the muses away, again. So, to thank you for sticking with me, and to apologize for all those times you checked in only to see that "Move It" post was still up, for, like, the the twenty-seventh day in a row, I am going to solve one of life's little annoyances- static cling in your clothes- here and now. Maybe you already know these tips, and this will be super-anti-climactic after weeks of waiting for my (triumphant?) return, but, hey, at least you got a new picture to look at.


How to Get Rid of Static Cling

You know how sometimes, as you go through your work day, your clothes seem to take on a life of their own, and be drawn like magnets to each other and your body? And then your hair starts sort of sticking up on end, and you get that unpleasant electrical-charge feeling all over your body (this especially tends to happen when you are wearing tights or clothes made out of synthetic material)? If you don't know what I'm talking about, congratulations on avoiding this common problem, but you should probably go to a doctor to get checked out because there's a good chance you are an alien.

There are three no-fail methods that will cure you of the cling:

Method #1: Dryer Sheets
Not to put in your dryer, silly (although that might help with the cling, it also leaves a residue on all your clothes and prevents your towels from absorbing as much). Instead, keep a box of dryer sheets handy in your desk at work (or one or two in a Ziplock in your purse), and if the cling attacks, simply rub one of the sheets over your clothes and hair. I don't know why, but it works. I'm pretty sure this is one of those mysteries that science hasn't figured out yet, like what's smaller than a quark or the Loch Ness Monster (that was poorly phrased- most things are smaller than the Loch Ness Monster, probably, but you know what I mean).

 Method #2: Hand Lotion
If you don't happen to have a dryer sheet handy, there's a decent chance you'll at least be able to find some hand lotion. Pour a tiny bit into your hand and work it into your skin underneath where the clothes are clinging. Be very careful not to get it on your clothes in the process, as lotion will leave greasy marks on some fabrics. But for some reason, the lotion will kill the static, and your clothes will start to behave again. Once you have rubbed in all the lotion, gently run your hands over your hair to tame the wildness without looking like you haven't showered in a few days.

Method #3: Hairspray
In a real pinch, you can spray hairspray on your legs or skin to keep the clothes from clinging. But what's worse- static cling, or hairspray on your skin?


photo credit: via jbcurio on flickr

Monday, November 15, 2010

The Perfect Blend

New York City is both the best and worst place to live if you are a food lover. On the one hand, there are an endless number of incredible restaurants and gourmet shops, plenty of people to enjoy them with, and even the most obscure ingredients can be found all year round. On the other hand, if you want to use those ingredients, chances are you will be doing so in a kitchen the size of breadbox. Wait, a shoebox. No, a matchbox. 
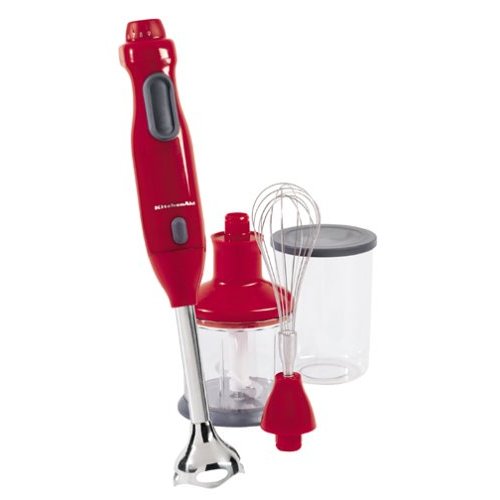
Because I suffer from tinykitchenitis myself,  I am always on the hunt for kitchen tools that work well for a lot of purposes and don't take up too much space (I love you, citrus juicer, but you have six parts, take up a whole shelf and only do one thing). That's why I have a special (very compact) place in my heart and kitchen cabinet - same thing, really-  for my stick blender. I have the Kitchenaid KHB300 model, $89 at Amazon.com, but there are other good ones out there for as little as $20.
This little sucker has essentially replaced my blender, Cuisinart and hand mixer, and takes up less space than any of them. It's basically the Optimus Prime of kitchen appliances...in that it's a transformer (get it?) The blender blade can do anything a traditional blender can do, only it does it right in the pot/bowl/pitcher, so you end up with fewer dishes. Pureeing a huge batch of soup is a messy pain with a normal blender, but oh-so-easy with a stick blender. Pop on the food processing attachment and you can chop onions in a few seconds, without any mess. Need to whip up some mirangues for dessert? Pop on the whisk attachment and boom, you're in business. Then, the attachments go right into the dishwasher to clean, and then stow away in no space when you're done.  If it sounds like I am doing an infomercial, it's because I actually feel like I am in an infomercial when I'm cooking with this thing.
So much functionality packed into such a tiny package... kind of like my kitchen.

Thursday, November 4, 2010

I Like To Move It, Move It

To answer your question ("Where ARE you?"), I'm back in California this week. The purpose of this trip is multi-fold: I'm visiting my parents before the holidays (as we will be spending both Thanksgiving and Christmas with JM's family this year), I attended a family milestone birthday party, I'm checking up on my baby brother-in-law who recently moved to L.A., and I'm running a half-marathon on Saturday. Here's the thing: Whenever I'm out here, I am struck by how active my days are. And without my even trying (half-marathon aside, of course)! It seems like all the fun things I do- swimming in the pool, going to the beach, playing croquet, volleyball or Frisbee (if you can, in fact, call my efforts "playing Frisbee"- I might be the only person in the universe incapable of putting spin on a Frisbee), hiking, yoga, chasing after my friend's baby- are all inherently active and athletic pursuits. In fact, the only thing I do that isn't exercise is sun-bathing, and even then, I break a serious sweat. It's like the exercise just happens without my even thinking about it.
Which, now that I think about it, is probably why my parents, who are senior citizens, actually look more like seniors in college (okay, that may be a slight exaggeration, but you get the idea). It seems like instead of allocating an hour at the gym every day, you can achieve similar, or better, health results just by keeping moving all the time. So my new motto for life (I have a few of them), is "Just Keep Moving".
Here are just a few healthy habits for things you can do in your real life to keep your body in shape, without setting foot in a gym. Admittedly, these aren't as much fun as beach volleyball, but they sure beat the treadmill.


-Walk It: Instead of taking the car, walk your errands (or even better, run them). Carry your laundry to the cleaners and pick up your dinner as take-out, instead of having it delivered. Take the stairs instead of the elevator (or better yet, move into a 5th-floor walk-up, like us). If you have to drive, park on the far side of the parking lot and walk across, like my dad does.

-Bike It: Put the new bike lanes in New York City to use, and bike to work and around the city. Just please wear a helmet- if the pedaling doesn't get your heart pounding, near accidents with taxis certainly will. It's just like Spinning class, but without that hamster-on-a-wheel feeling.

-Carry It: Instead of getting a cart at the grocery store, grab a basket. You'll work your biceps carrying it around, and you'll be less likely to buy junk you don't need. And while you're at it, bring your own bags to the store and carry your groceries home yourself (this is especially good exercise if you live in a walk-up, see?)

-Build It: Earlier this week, I assembled my parents' new grill. At one point, I was in a crunch position for about ten minutes attaching two parts, and I realized that even that is pretty decent exercise. So next time you make a run to Ikea, load the car and assemble it yourself. And since you'll have to deal with sorting out all those screws and washers and deciphering those directions, this one will be a good exercise for your brain, too.

-Fix It: Anyone who has ever tried to move a toilet, or held a 50-lb lighting fixture while someone else screwed it in to the ceiling, knows that DIY is as good for your bod as it is for your house. And it's so rewarding!

-Clean It: Next time you have to clean your place, put on your workout gear and some pump-up tunes (I recommend Sean Paul), and treat it like it's exercise. It'll be a better workout than a jazzercise tape, and you'll get so much more done.

-Grow It: If you have the space (and green thumb) for it, start a garden. Shoveling, weeding, mowing, hoeing, mulching and watering are all great exercise, and you'll have pretty flowers or tasty veggies to show for it (in addition to your rock-hard abs).

Here's hoping this moves you!

Thursday, October 21, 2010

Save Your Soles

I'll admit it: I'm hard on my clothes. In order to claim a spot in my wardrobe, an item has to stand up to dog hair, cooking splatters, weird cleaning concoctions, and very cramped conditions in my tiny NYC-sized closet. And, arguably, my shoes get it twice as bad (since they have to deal with all that, plus being walked on).
It's that time of year where I'm putting away my sandals until spring (so long, my darlings!), and pulling out my boots and winter heels.  In fact, in my misspent youth, I used to just buy cheap shoes, wear them until they were destroyed, and throw them in the garbage at the end of the season.  But ever since I met JM, I'm rethinking this strategy. My dapper husband only buys about one high-quality pair of shoes per year. He keeps them carefully shined and taken care of, and has them resoled from time to time. It turns out that cobblers are nothing short of footwear miracle-workers. I swear to you, my husband has eight-year-old pairs of shoes that look brand new (meanwhile, I have eight-month-old pairs that don't even look like shoes anymore).

Before you rush out to buy a whole new fall shoe wardrobe, take another look at those kicked-around shoes in the back of your closet. Here's just some of the things a good cobbler can do for you.  No sole-searching required.

Stretching: If your shoes are too tight, you can have them stretched (up to a full size) for short money. No more pinched toes!

Leather Repair: A quality tailor can fix cracks, tears, scuffs, and scratches in leather to make them almost invisible. And they can clean and revive battered suede.

Resoling: If you find yourself with a Charlie Chaplin-style hole in your shoe, it's probably because you love those shoes. Fear not- a cobbler can replace the whole sole for a fraction of the cost of a new pair.

Reheeling: If you just can't stop yourself from wearing stilettos to a garden wedding (I've been there, sister), you probably have torn and grass-stained heels. A good shoe repairman can totally clean and patch those heels. So you can wear them to another garden wedding.

Dyeing: If you have a pair of white pumps leftover from a wedding (or the '80s), but you still like the shape, you can have a cobbler dye them any color you want, whether they are fabric or leather.

So give those shoes a new lease on life.

Thursday, October 7, 2010

Selling Power

Earlier this week, I dropped my phone, shattering the display glass (prompting my ever-so-tactful husband to sigh and say, "maybe you just shouldn't own fragile things"). After I shot him a steely glare of fury, I decided that instead of paying someone to repair the phone, I would do it myself (in my typical, frugal, DIY way) using a kit I got off the Internet, and instructions via Youtube. I have a good sense of the mechanical, and better-than-average fix-it skills, and the nerds in the video made the repair process look like a breeze, so I really thought I had it in the bag.  But as I was trying to pry the little fragments of broken glass off the phone, I heard an ominous crunch from inside the phone, which portended what I already knew to be true- I had made a bad situation much, much worse.  All of this is to say that I had an unexpected major expense this week in the form of a new cell phone.

In order to offset the cost, and for a fun little goal for myself, I decided I should try to recoup my loss by selling stuff from around the house. Drawing inspiration and advice from my friend Rachel, who has sold more stuff than Ron Popeil, I got out my digital camera, and set to work. Here are the best ways to sell your stuff- even the junk you think is worthless- to easily get some quick cash. Remember, one girl's trash is another girl's brand new iPhone 4. Or something like that.

EBay: I have long been an eBay buyer, but I recently took my first foray into selling. Almost anything you want to sell, you can find a buyer for on eBay. I mostly have sold clothes- anything brand name in good condition will fetch you at least a few bucks- just take flattering photos of the article on a hanger against a white background. Be honest about any flaws, and start the bidding low. I suggest listing a bunch of things all at once- people who like one of your items might check out the others, and you'll save yourself a bunch of trips to the post office when you ship them.


Craig's List: If you live in a fairly metropolitan area, you should list your items on your local Craig's List. I have used Craig's List to sell old furniture and household goods. Again, nice pictures that show the item in a flattering light are a must. Check to see what the going rate is for similar items, and undercut it by a few dollars, and feel free to haggle with buyers. The benefit of this selling method is that the buyer will pick up the item from you (no shipping!), but to be safe, you should meet them at a well-lit, crowded spot, like the coffee shop on your corner. If you are selling something large like a piece of furniture and must let the buyer in your home, make sure there is someone else there at the time- the world is full of freaky people, and one of them might show up at your door under the guise of buying your old boombox.


Gazelle.com: If you have old computers, cell phones, iPods, video games, PDAs or other electronics lying around, Gazelle.com wants to buy them from you. They will even send you secure prepaid packaging in which to return it to them, so you don't even have to worry about postage. I sold them an old laptop that was totally dead and a Palm Pilot that I had in the 90s, and they actually gave me money for them. Ironically, they even bought the cell phone I trashed. 


Second Spin: You know how all of your music is on your computer now? But you still have stacks and stacks of old CDs lying around taking up space, don't you? Second Spin will buy your used CDs and DVDs for a decent price. So you can clear out those drawers or shelves of all those ugly plastic cases (and put money there instead).


At Last Resort:  If you have stuff you can't sell, but is still redeemable (i.e. a whole bag of gently-worn Old Navy tank tops), there's still one thing you can do- give it away. Take it to a non-profit thrift shop (try Housing Works in NYC, or the Salvation Army nationwide) and get a receipt so you can deduct the donation from your taxes. It won't technically make you money, but it might save you a bit come April. Plus, it might actually help someone else out, too.

If you have never tried selling things, you'll be amazed at how fun, and oddly addictive, it is. Give it a try- I foresee your closets getting less cramped, and your wallets getting more so.

Friday, October 1, 2010

Separate, but Equally Delicious

Here's a real quicky tip because it's Friday, and I know you're busy and trying to get things done before the weekend, and I'm busy, and really distracted thinking about bananas. Wait, what? You heard me- bananas, people. You know how, no matter what you do, you always seem to end up with one or two overly-ripe bananas at the end of the bunch? It's not really such a bad thing, because it gives you an excuse to make delicious banana bread (you can also freeze them for making smoothies later on), but it's kind of annoying how fast those nanners ripen, right under your nose. So here's a tip for delaying the speed at which those suckers turn brown and narsty: Separate them. You don't have to, like, put each banana in an opposite corner of the room, just keep them from being so snuggled together. Each banana gives off ethylene gas and enzymes which cause all the other ones to get riper faster.  If you break all the bananas apart at the stem when you get them home, you will delay the ripening process.

So, you want your bananas to stay just right for longer? You gotta keep 'em separated.

photo credit: ehow.com

Friday, September 24, 2010

Travel Tip #008: Red Car(pet) Treatment

JM and I don't own a car, so between destination weddings, weekend trips to Boston, random Ikea pilgrimages, and all our other travels, we end up renting a lot of cars. This used to be my least favorite part of traveling- the whole process of getting off a plane, taking a shuttle, waiting in line, filling out the paperwork, and then having to walk around the car looking for dents... it just really got my goat.  One time, after a long-delayed flight to Denver, we arrived at 1 am at the rental car desk to find a line of twenty people, with just one person working behind the desk, and I almost burst into tears. We didn't get out of there until almost two hours later, and thereafter I had an almost sickening dread of the whole car-renting enterprise (no pun intended).

But then, something wonderful happened! JM and I found out about the premier memberships at car rental places, and signed up for them, our lives changed for the better, and we lived happily ever after. The End.

Premier memberships at rental car agencies allow you to skip the line, go straight to your car and drive out. They also make you first in line for upgrades and other perks. Basically, they eliminate all of the unpleasant parts of renting a car, and make you feel like a VIP (even if it is just at the rental car parking lot).  But, best of all, if you are a little wily, you can get them for free. Shut up, right? But I won't shut up because it's true.  Like you, I always thought that you had to pay for those perks, but it turns out paying is for suckers - the agencies waive those fees for a wide variety of reasons, and some of them may even apply to you (and even if they don't, you can pretend they do). Here's how to sign up for some of the major rental companies premium service totally gratis.   You don't have to thank me- just wave at me as we both zip past the line and out of the parking lot.

The below programs are always free, for everybody. I think the only reason everyone isn't already signed up is because they seem exclusive. Don't be fooled and let the sheep stand in line. One caveat- you will have to enter your credit card information to sign up (and be sure to read the fine print, as with any offer).

Avis Preferred
Alamo Quicksilver
Budget Fastbreak
Dollar Express
Thrifty Blue Chip

Hertz #1 Gold: Hertz offers free Gold membership to American Express cardholders, US Airways frequent fliers, and many others (otherwise there is a $60 annual fee). You can check all the associations to which you belong, to see if you qualify, or you can just use this link, enter
Program Name: US Airways Preferred
Promotion Code: 6173
and be on your way.

A few more tips:
-Try to concentrate rentals on one or two agencies you use the most (we use Hertz and Avis), so you accrue points and free rentals.
-Lots of companies and associations offer discounts at rental agencies, so if you belong to AAA, USAA, AARP, etc. or you work at a large company, make sure to enter that info or mention it at the counter. You'll be amazed at the discounts.
-When all else fails, don't forget to check online coupon websites to find promo codes.

Wednesday, September 22, 2010

A "Better" Rule

 I have a weird habit of telling myself what to do. Like, I'll throw a tissue at a public garbage can and miss, and be about to just walk away and leave it, when the busybody in my head says, "where do you think you're going?," and I have to sheepishly go back and pick it up.  This is probably because I'm very bossy in general, and because I was home-schooled as a child and spent a lot of time in my own head (not much has changed, really, now that I think about it- except now you guys have a window in). I suppose this is what you call a "conscience," but I choose to think of it as my own personal Internal Rule Book.  These rules include things like "Never Put Off Until Tomorrow What You Can Do Today" and that old classic "Do Unto Others..."

But one of the best rules I try to live by is "Leave It Better Than You Found It".  Once you get this little phrase knocking around in your noggin, you'll be amazed at how often it applies to your situation. Here are just some of the little ways to try to leave things better as you go through your day.


While Shopping- When you try things on in a store,  hang everything you're not buying back up on the right hangers to give back to the salesperson, and pick up any pins or tags that are lying around.


 Litter- When I take Skip for a walk and have to use a baggie to pick up her, ahem, deposits, I also pick up whatever stray cigarette butts or gum wrappers are lying  around nearby. I am already crouching on the sidewalk with a plastic bag on my hand, so why not?


Bathrooms- When you use a public restroom (or even at a friend's house), replace the toilet paper roll when it's empty, and rinse out the sink when you wash your hands. Even if the mess was there when you got there, the next person is going to think you did it, so you might as well tidy up a bit.


Borrowed Things- If you borrow anything, be it a dress, a car, or a power saw from a friend, give it back in better condition than you got it- send the dress to the dry cleaner, replace the blade on the saw, and fill up the tank on the car.  It's still way cheaper than buying your own.


Parties- I'm not suggesting you turn on a loud Huey Lewis song and start a food fight like in some 80's movie, or try to be the life of the party at every shindig you attend, but if you introduce two people who make a connection, man the bar for a little bit (again, no Cocktail- style bottle twirling required) and help clean up a few glasses at the end of the night, the party will have been better for your being there. 

At the Office- At even the best offices, things sometimes get boring, tedious, frustrating, depressing, and repetitive. Rather than joining in the chorus of complaints, though, shut your mouth and try to make things just a tiny bit better- replace the toner cartridge in the printer everyone's been ignoring, bring in some cookies to share, thank someone for their hard work, and give credit where it's due. At least you won't be bored.


Your Home- Each day, try to make your house or apartment a little better than it was the day before - Whether that's through a big project like re-tiling your bathroom, or a little one like changing a light bulb that's burned out. I don't always succeed at this one (it's a little like swimming against the tide), but I'm always glad I tried.


 Boyfriends- Well... you probably aren't going to change them much for the better. But at least try not to screw them up too much for the next girl.

When you set your mind to the idea of the little contributions you can make to wherever you are, you'll find yourself doing them without thinking.  At least until that little voice in your head says "well done, ol' chap!"

Wait, did I mention that my conscience is British?

Monday, September 20, 2010

Power Play

Have you ever noticed how, wherever your wall outlets happen to be located, they are always in the wrong place? Like, on the end of the room where you would never put your TV. Or just a little too far down the wall to allow for you to vacuum the whole room.
Most notably, in almost every apartment I have lived in, the bedroom outlet seems to be located exactly behind where you would put a nightstand.  Which isn't so bad for plugging in a bedside lamp, but is a real pain in the posterior for plugging in anything else. Especially if you use your phone as an alarm clock (I also use mine as a calendar, watch, notebook, and flashlight), and want to have it close at hand in the morning - moving your nightstand to plug in each night just isn't an option.   Which is why I devised a clever (if I do say so myself) solution to this problem. I bought a simple extension cord with two outlets, and ran it from the outlet behind the nightstand. Using zip ties, I attached it to our bed frame, hiding the cord behind the nightstand (if you don't have something to hide the cord behind, you can use a staple gun to discreetly attach it to the wall along the floor). Now I have two plugs easily at hand, exactly where I want them for charging my phone and my Kindle.  I'll put in a plug for this current idea you can really get a charge out of.

Wow, that was corny.

Thursday, September 16, 2010

It's A Sign

In case you were wondering what I was up to during that lengthy period of time in August when I was not posting on the blog regularly, here's the answer: projects. Oh, sure, I did I certain amount of reading, suntanning and swimming (with the occasional wedding thrown in for good measure), but for the most part, when my mom and I get together, we end up doing projects. It's probably a good thing that we don't live in the same town because JM and my dad would forget what we look like without sawdust in our hair and paint on our faces. And this summer, one of our projects was creating signage. My family's lake cottage is in an old self-managed association where most things have a lovable, decaying, well-used quality to them. This year, we decided to class the place up a bit by replacing some of the more decomposed wooden signage that had been around since the (first) Roosevelt administration, and had become, essentially, unreadable. I like old signs as much as the next guy, but here's a tip: When you can't read them anymore, it's time to throw in the towel. But why hire a sign-maker, when you can easily make your own professional(ish)-looking painted signs yourself? With simple materials you can easily find, you can make signs for whatever your heart desires- house names, street numbers, "keep out- no boys allowed" for your treehouse- the possibilities are endless. Here are the easy-peasy steps we took to make our fancy new signs. And may they happily point the way and rot until my great-great-grandchildren replace them.


What you will need:
A piece of wood, cut to size
A computer print-out of what you want the sign to say, sized to fit
A piece of graphite transfer paper
Acrylic paint and a small flat-sided paintbrush
Varnish and a disposable sponge paintbrush

What you do:
  Step 1: Using your computer, print out the lettering for the sign in the size and font that you like (you may have to print it in several pieces and tape together, as I did). Place a piece of graphite transfer paper, graphite down, on your wooden board. Place the print-out on top, aligning how you like, and attaching it with tape to secure.
Step 2: Carefully trace the lettering on the print-out with a sharp pencil, pressing firmly. In case the photo at left has you perplexed, I do not have teeny-tiny hands- that is just an abnormally large pencil. For your purposes, any size pencil will do. Even a pen would probably be fine, come to think of it.
Step 3: Remove the print-out and graphite paper. I could have omitted this photo, and almost did, because it doesn't really illustrate anything and reveals that I messed up the placement of my graphite paper, and didn't transfer the top half of the word "courts". But I didn't because I wanted to show that everyone makes mistakes when doing projects, and it's no big thang- just fill in the tops of the letters freehand, and get on with it.Or, just place your graphite correctly in the first place.

Step 4: Using a thin paintbrush and your acrylic paint, carefully fill in over the lettering. The paint will cover the graphite. If you smudge, you will be able to wipe up the paint as long as it is still wet, so keep a rag at hand. Also, imperfections are part of the charm of homemade signs, so relax.


Step 5: Allow paint to dry completely. Cover entire piece of wood with varnish, and allow to dry until set. Hang or place your masterpiece and revel in your handiwork.

Monday, September 13, 2010

Travel Tip #007: Surf Wisdom

Dear Readers,
okay, I'm back now. For real this time. This has been the summer to end all summers with my travel schedj/busyness level, but that's no excuse for neglecting you as I have. Thank you for your patience with me, and I promise never to abandon you again. At least... not until next summer. 

Given that I grew up in Southern California, have long, sun-bleached blond hair, occasionally use the word "gnarly" in earnest, and take every opportunity available to get a suntan, it's no wonder that I frequently get asked the question "do you surf?" Given that he grew up in Boston, wears a suit most of the time, and can frequently be seen carrying copies of the Wall Street Journal and the Financial Times in his L.L.Bean tote bag, and occasionally uses the word "chuffed" in earnest,  it's no wonder JM does not frequently get asked that question. But, come on, people, didn't your mother ever tell you not to judge a book by its cover?

While I prefer to build sandcastles and read US Weekly on the beach (how tan can you get in a wetsuit?), my ever-unpredictable husband has taken up surfing, and, as is the case with everything he does, he has thrown himself in headlong. And it turns out, thanks to impressively large big toes, and a lifetime of ice skating and skiing, he has better-than-average balance, and a natural affinity for the sport. Within days of his first lesson last winter, my Google searches started auto-suggesting "used surfboard, nyc", and copies of Surfer and Surfing magazines started showing up in our mailbox (yes, those are two different magazines- there's also Surf, Gold Coast Surf, and Eastern Surf, it turns out). And while I have mostly been content to stack these by his bed, or shove them into the aforementioned tote bag (along with the Economist), I found myself flipping through this month's issue of Surfer, and, in addition to enjoying the eye candy of beautiful people shredding in beautiful places, it's surprisingly well written and... I actually learned something.

So this week's travel tip comes to us from the editors of Surfer, with our compliments, and wishing them warm waters, perfect breaks, and gnarly sessions, or whatever.

Here it is: Before traveling abroad, scan the important pages of your passport into your computer, and email the files to yourself (my own suggestion would be to also save them to a Google Document, so they are easily found in a pinch). That way, if your passport gets lost or stolen, you will be covered (and lest you think the editors of Surfer have taken too much water in their ears, the State Department website also suggests you photocopy your documents before you travel- but methinks an accessible electronic copy is better than a paper copy you might forget or lose along the way). While you're at it, I might suggest doing the same with your birth certificate, credit cards, social security card, and driver's license (just be sure to make the files private and password protected, and title them something nondescript, like "Travel").  As a bonus tip, Surfer also recommends that you "don't waste money taking a fish to Hawaii," whatever the hell that means.

See? And here you were, thinking all surfers were brainless, and then they go surprise us with this wonderfully clever tip. Boy, were you wrong about surfers.


Well, maybe not all surfers.


photo credit: via rougerouge on flickr.

Wednesday, August 18, 2010

Let's Get This Straight

Sewing is one of the housewifey things that it seems like the domestically challenged have the hardest time wrapping their heads around. I'm not just talking about sewing on a button, or fixing a saggy hem (although those pose their own challenges to some folks), but actually taking fabric and making something out of it. The idea of it almost seems quaint, in an era when you can get a cute outfit at H&M or a full set of patio cushions from Ikea for less than the fabric it would cost to make them. Of course, they (both) will start to fall apart the first time you sit down, but still.
However, because my parents took a sort of Laura Ingalls Wilder approach to child-rearing, I actually like to sew. When I was an awkward preteen, my mom enrolled me in a sewing class which culminated in my being forced to model a pair of culottes of my own creation in a "fashion" show at the county fair. While it was among the most mortifying experiences in a lifetime full of mortifying experiences, the sewing know-how seemed to stick. While I don't have much of a desire to attempt to create my own skorts or palazzo pants these days, I still take a certain pride in my ability to make my own curtains, pillows, tablecloths, and baby quilts that don't cost a fortune, and have that handmade-with-love vibe to them.
All of this is has been a very long-winded (and cathartic) intro to the topic of one very simple sewing trick that might be the solution to a problem vexing the sewing-phobes among you- how to cut fabric straight. It's one my lanky, bespectacled (in retrospect, creepy) bachelor of a sewing teacher imparted to me, and one that has come in handy many times over the years. And does it work? You bet your culottes.

How to Cut Fabric Perfectly Straight

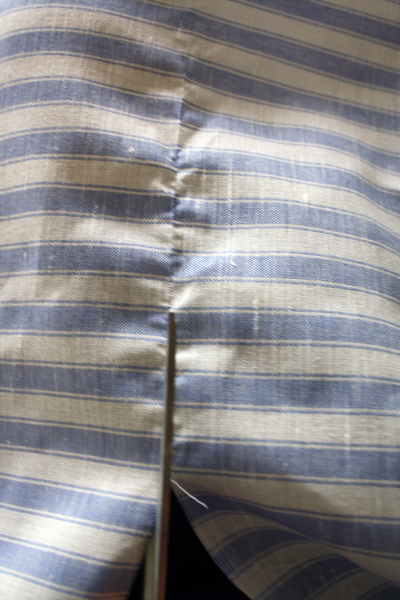
 Step 1: Cut a slit in the fabric about where you would like to cut the straight line. Pick at one edge of the fabric until a string comes loose that you can grab on to.
 Step 2. Yank on the string, causing a pull that runs the width of the fabric. Pull the thread until it breaks, or comes completely free of the fabric. The run you have made in the fabric will leave a perfect line in the weave of the fabric.
Step 3: Using your sharpest scissors, cut following along the line that the string left. Voila- a perfectly straight cut! Now, whatever your sewing-related traumas may be, wonky edges won't be among them.


top photo credit: blog.craftzine.com