Monday, November 30, 2009

On the Sauce

Hello! I hope you all had a lovely holiday weekend. We sure did. I got to spend most of the weekend engaged in two of my favorite hobbies: cooking and eating.
For Thanksgiving dinner, I got the big-girl job of bringing the appetizers. I always am looking for an excuse to make my very favorite, the king of the appetizers: shrimp cocktail. I am mildly allergic to shellfish, but I love shrimp cocktail so much that I am willing to throw caution (and rationality) to the wind in order to eat just a few of these little suckers now and then. But there is such a thing as bad shrimp cocktail (and I don't just mean the kind that gives you food poisoning), when the shrimp are rubbery or the sauce is store-bought and overly sweet, and, in those cases, I am always sorely disappointed to have risked anaphylaxis. I have finally perfected my own recipe, and it is delicious and foolproof.

The trick with the shrimp is to buy the frozen uncooked easy-peel shell-on kind. The precooked ones always seem to end up rubbery or tough, and I find the shells help them cook evenly and taste fresh. All shrimp are frozen in the fishing process, so if you buy them unfrozen, you are just paying a premium for the grocery store to thaw them for you. And I insist on making my own sauce, which, while simple, makes all the difference between a mediocre cocktail and one that is worth risking hives over.

Shrimp Cocktail Sauce
1 cup ketchup
1/2 cup Heinz chili sauce
1 tablespoon horseradish (found in the refrigerator section)
1/2 teaspoon Worcestershire sauce
2 tablespoons fresh lemon juice
1/2 teaspoon Tabasco
1-2 cloves garlic, minced or pressed through a garlic press
1 tablespoon fresh cilantro, chopped

Combine all the ingredients in a bowl. Refrigerate for up to a week.

Cocktail Shrimp
Thaw the shrimp for about 10 minutes, by placing them in a colander under cold running water. Meanwhile, bring a large pot of water to a boil. Boil the shrimp for 3-5 minutes, until they are bright pink, and the flesh is no longer translucent. Meanwhile, rinse the colander thoroughly. When the shrimp are cooked, return them to the colander and run fresh, cold water over them, until they are cooled. Peel the shells off, leaving the tails attached. Serve with lemon wedges and cocktail sauce. Yumma!

Thursday, November 26, 2009

Happy Thanksgiving!


As we express our gratitude, we must never forget that the highest appreciation is not to utter words, but to live by them. - John F. Kennedy

Wishing you all fat turkeys, victorious football teams, high-flying balloons, full bellies, happy families, and much to be grateful for!

Tuesday, November 24, 2009

Puttin' On The Spritz

This year we are celebrating Thanksgiving with my husband's family, and will be going to dinner at his aunt and uncle's house, just outside the city. So, instead of us traveling to Boston, this year, my in-laws are coming to us. And while I won't miss attempting to schlep pies on an overcrowded, traffic-jammed bus, I do want to make the apartment lovely and welcoming for my mother-in-law (even though she has already promised to overlook the dog hair and dust bunnies), which creates it's own list of to-do's.
Here's a simple and easy trick to make your life easier this holiday season. Instead of pulling out the ironing board every fifteen minutes to de-wrinkle the endless stream of tablecloths, guest linens, holiday ribbons, and party clothes that you need, pull out a spray bottle. Fill it with clean (preferably distilled) water and, if you want, a few drops of lavender or rose water. Simply spread the tablecloth over the table, or the sheet on the bed (or hang that blouse from a hanger) and mist the fabric with water, getting the whole thing slightly damp. Then run your clean hands over the surface, and gently pull on the hems, smoothing out any wrinkles. Allow the fabric to dry completely, and it will look like you spent hours slaving over the iron. It's the perfect solution when you're pressed for time.


Photo credit: Real Simple

Monday, November 23, 2009

I'm The Firestarter

One of the nice things about the chill of fall is that we are able to make use of the two lovely fireplaces we have in our apartment (yes, that was me bragging just now). Hauling firewood up four flights of stairs is sort of ridiculous, but worth it once you get that warm, glowing fire burning.
My husband, JM, considers himself a bit of a fire-making expert. (And I usually have the good taste to bite my tongue about the Great Valentine's Day Smoke-Out of 2003. Hey, everybody makes mistakes.)
JM has his own special method that consistently (except that one time) works like a charm in creating a long-lasting, beautiful-looking fire that lights right up. I made him teach me how he does it, since I'm such a know-it-all and not the kind of girl who likes to sit back and have things done for me. (Why am I not that kind of girl? My life would be so much easier...) And now I teach it to you, so you, too, can be a pyro-maestro. But lest you start feeling sorry for my husband, what with me edging him out of his favorite job, and blabbing his secret techniques on the Internet, don't worry -- I still let him carry the wood.

How to Light a Fire in a Fireplace

1. Start by taking a sheet of newspaper and rolling it loosely on the diagonal into a long strip and then tying it in a knot. Make 3 or 4 of these newspaper knots, and then stuff them under the fireplace grate (something about the way they are rolled makes them burn much longer and better than wadded up newspaper, which, JM asserts, is for amateurs).

2. If you have some, place some kindling, like small sticks or pine cones on top of the grate. JM insists you do not need kindling, as long as your wood is dry enough, but I always use a little, just in case.

3. Arrange your logs on top of the kindling. JM says the best arrangement is with three logs to start. Place the first two logs parallel to one another and about 2 inches apart. Place the third one on top of the first two, at a diagonal angle. This arrangement is compact enough that the fire will spread from log to log, but leaves enough air around each log to keep the fire fed.

4. Make sure the flue is open (look up the chimney, and you will see a little lever which opens and closes a hatch. The hatch must be open, or you will flood the whole room in smoke, which is decidedly unromantic). You also have to make sure that the chimney is drawing (a downdraft in the chimney will also make the smoke move in the wrong direction). To do this, take another piece of newspaper, roll it up and light the end on fire. Hold the flame up to the chimney, and warm the air there, until you see the smoke being pulled up the chimney.

5. Use the piece of burning newspaper to ignite the newspaper knots in the fireplace. Sit back, relax and enjoy your roaring fire.


photo credit: www.ukhomeideas.co.uk

Friday, November 20, 2009

My Great Cake Mistake

We're only a family of two (well, two that eat human food), so even though I love to bake, I usually have to wait until we are having people over in order to have an excuse to make a cake. But, I recently spotted this recipe and had a very exciting and very dangerous realization- if you half almost any cake recipe and bake it in a loaf pan, you get a very appealing little dessert cake that is just the right size for two (with leftovers to tide over your sweet tooth for a few days). And then I thought, after all, what is a banana, pear, or zucchini bread but a cake without the frosting? And, by that token, what is a muffin but a cupcake without the frosting? All these years I've been eating cake without even appreciating it at the time. It was The Great Cake Mistake. These were very troubling thoughts, so I put them out of my head and decided to embrace it and bake instead.
Last weekend, I whipped up this carrot cake loaf with cream cheese frosting from Everyday Food (not exactly health food, people), and it was delicious. The frosting is sweet and tangy and complements the moist cake perfectly. You could add raisins or nuts, if you are still being delusional about this not being a cake, and want it to feel more bready. We ate the whole thing over the weekend, and enjoyed every crumb. Don't say I didn't warn you, though- baking for two can be very hazardous to your health (and your waistline). But it's a pretty good deal for your taste buds.

Carrot Tea Cake With Cream Cheese Frosting
Here's what you need:
1/2 cup (1 stick) unsalted butter, room temperature, plus more for pan
1 1/4 cups all-purpose flour (spooned and leveled), plus more for pan
1 teaspoon baking powder
1/2 teaspoon baking soda
1/2 teaspoon salt
1/2 teaspoon ground cinnamon
1/2 teaspoon ground nutmeg
1/2 cup packed dark-brown sugar
2 large eggs
1 1/2 teaspoons pure vanilla extract
1 cup packed grated carrots (from about 2 carrots)
1/2 cup raisins or nuts (optional)
1 bar (8 ounces) cream cheese, room temperature
1 cup confectioners' sugar

What You do:


1. Preheat oven to 350 degrees. Butter and flour a 5-by-9-inch (6-cup) loaf pan. In a bowl, whisk together flour, baking powder, baking soda, salt, cinnamon, and nutmeg.


2. Using an electric mixer, beat butter and brown sugar until light and fluffy; beat in eggs and 1 teaspoon vanilla.


3. Beat in carrots (and raisins and nuts, if using). With mixer on low, gradually add flour mixture; beat just until combined.


4. Transfer batter to prepared pan; bake until a toothpick inserted in center comes out clean, 40 to 45 minutes. Let cool in pan 5 minutes. Turn cake out onto a wire rack, and let cool completely.


5. Make frosting: Using mixer, beat cream cheese, confectioners' sugar, and 1/2 teaspoon vanilla until fluffy.


6. Frost top of cooled cake. Bid your diet a fond farewell.

Thursday, November 19, 2009

Bag It

One of the things that sucks about autumn is that all the delicious produce of the summer starts disappearing from the grocery store shelves, and being replaced with less-desirable imported versions. Some of it, like strawberries that are more white than red, simply are not worth bothering with. I'm telling you, put down the rock-hard apricots, back away slowly and wait until spring. And, unfortunately, what is available and worth eating is frequently very unripe (because it's easier to ship that way).
Luckily, there are some fruits that can still be salvaged at the grocery store, bananas, tomatoes and avocados are among them (yes, tomatoes and avocados are fruit- don't argue with me). There is a quick trick that you can use to make any unripe fruit, like those green bananas, or hard tomatoes or avocados ripen more quickly. Simply place the unripe fruit in a brown paper bag, fold over the top and leave out on your counter or in a warm (but not hot) part of your kitchen. The bag releases a hormone called ethylene that causes the fruit to ripen more quickly. Ripe apples and bananas also release ethylene, so if you are in a hurry to get those avocados ready for a fiesta tomorrow night, add one to the bag. It's one way to be in the ripe place at the right time.
Just make sure you check them periodically- if you aren't careful, a firm tomato can turn into tomato puree overnight. Come spring, this trick will work for plums, nectarines and peaches, too, but berries and pineapple don't ripen after picking, so make sure you pick out good ones. Now you're on the ripe track.

Wednesday, November 18, 2009

Face(book) The Facts


Sometimes it feels like the world of technology is moving faster than etiquette can keep up. And nowhere is that more apparent than on Facebook. Unless you are ultra-selective with your friends, your Facebook friends aren’t the same thing as your REAL friends. They’re more like your Facebook acquaintances. And, as such, they shouldn’t have (nor do they want, most of the time) access to your most intimate life details. If you really need advice about a break-up or you notice your friend is looking “puffy” and want to know if she’s pregnant, this is not the venue to ask. Write an email, or pick up the phone - (that’s that thing with the numbered buttons, remember?). While the helpful PSA above outlines the basics, I've added some of my own guidelines (some of which I am guilty of having broken myself in the past). Just follow these simple rules and you'll be able to keep your head and save face on Facebook.

Facebook Etiquette 101

1. Never change your relationship status alone- it should be a joint decision when, and whether, you go from “It’s Complicated” to “In a Relationship”, lest your affectionate outreach end up unreciprocated. And never, ever, ever, break up with someone by changing your status to “Single”. That is ice cold. Your former flame deserves to know it’s over at least half an hour before his or her 387 best friends do.


2. Don’t “friend” people you don’t know. It’s fine to go through your friends’ friends looking for hotties, but ask your friend for an introduction first. If you absolutely can’t resist “friend”-ing someone you don’t know, at least send a message to them introducing yourself. Unless you are confident enough in your profile pic that you think it speaks for you, I guess.

3. Conversely, it is absolutely okay to decline a friend request from someone you don’t know (I recommend it, actually). No matter how good you make your privacy settings, they only work if you don’t friend anyone who asks. It’s like installing a high-tech security system in your house, and then leaving the door ajar. And it’s okay to un-friend someone after the fact, too – they won’t receive notification that it has happened (although they might try to look at your profile or get a “friend suggestion” for you, blowing your cover. If they confront you about it, just claim Mark Zuckerberg must have screwed up something in the system.

4. “Poking” isn’t a substitute for real friendship. If we went to high school together and haven’t seen one another in years, a “poke” isn’t exactly the best way to catch up. If you want to be in touch with someone, write something on their wall, message or email them, instead. Or, if you don’t particularly care about them, then keep your virtual fingers to yourself.

5. When going in to Facebook from someone else’s computer, always remember to make sure they are logged out before you sign in, and that you log yourself out when you are done. When my now-husband and I were dating, I saw that an old friend of mine and I weren’t Facebook friends anymore. I friended her and jokingly wrote the message, “OMG, biznatch, did you un-friend me?” Turns out I was logged in to my boyfriend’s profile, and they hadn’t met yet. Oops. I had some 'splaining to do after that.

6. It’s nice to update your status every now and then, but don’t go overboard. If you find yourself logging into Facebook to update your status to say what you’re doing before you actually do anything, then you need to reprioritize your life, dude. Plus, not everyone wants to know the embarrassing details of everything you (or your baby, or your dog) do. Look through your friends, and choose one (like your friend’s dad) to use as your standard-bearer. Before you update your status to, “iS ssoO/)ooo drrunk, and hungary fot pIZtza”, think of Mr. Friends-Dad, and whether you want him to read it when he wakes up in the morning. Then press “delete”.

7. Give your photos a serious, critical, look. Don’t be an idiot- take down, or at least un-tag, that pic of you playing beer-pong in a bikini (even if your butt looks great in it). Not only is your friend’s dad gonna see it, but so might potential employers. If you post pictures of friends, keep the same thought in mind for them. Once something goes ON the Internet, you can never fully take it off.

8. There’s a reason Facebook has “wall posts” and “messages” – they are two different things. “I luv u baby, you r so hott” is something best said (or messaged) in private, not posted on your paramour’s wall. Wall posts should be things that other people will find funny or interesting, too. The exception to this is birthday posts, because having a wall-full of birthday wishes from people you hardly know makes you feel all warm and fuzzy.

Follow these rules and you'll be interacting in the virtual world with just as much grace as you do in the real world. Just please don't ask me for etiquette tips for your World of Warcraft or Second Life avatars.

Tuesday, November 17, 2009

That's The Rub

I'm a firm believer that everyone, at some point in their lives, should learn to give a decent backrub. And I place emphasis on the word decent -- I'm not about to instruct you in the art of sensual massage, here (sorry if that comes as a disappointment to you). Whether it's after a long day hunched over your keyboard at work, or after a powdery morning on the slopes, everyone needs a good rubdown from time to time. But there is are few things more disappointing than going to all of the trouble to con someone into giving you one, only to find that they have clammy palms, weak fingers and no finesse. It does seem like backrubs are something that everyone likes to get, but no one really likes to give. But, as is frequently the case, once you master some simple techniques, and you become comfortable and confident in what you're doing, it can actually be a lot of fun (and no weird rubber hose required!).

When it comes to backrubs (as with everything in life), it seems the more you give, the more you get.

How to Give a Good Backrub
1. Have the intended beneficiary of your magic fingers lie or sit down in a comfortable position. Lying on an elevated surface (so you can reach them without hunching over) or sitting in a backless chair in front of you are good options. There is really no need for you to straddle them or any of that nonsense, as people often do- I think that's more of an intended seduction technique gone awry.
2. Alternate the following techniques. All of them will work fine through a shirt, but if you are massaging someone with whom you are intimate, you can have them remove their shirt and use a massage oil.
a) Begin by pressing the heels of your hands in on either side of the spine and slowly and firmly running them up the top of the back. When you get to the shoulders, turn your wrists so your fingers are pointed toward the armpits, and slowly work your way back down.
b) Press your thumbs into the back on the inside of the shoulder blades, and working them in small circles, work your way along the spine up onto the muscles in the neck.
c) In places where there is a lot of flesh (like the shoulders and lower neck), firmly grasp the muscle between your fingers and your thumb and (without pinching!) knead the muscle. Don't be afraid to work the muscle deeply, but make sure the recipient is comfortable.
d) Press your fingertips into the flesh at the top of the back (just the tips, not the fingernails- remember, this isn't that kind of massage), and pull down, raking your fingertips down on either side of the spine, stretching the muscles.

Here are some tips:
- Once you begin the backrub, keep at least one hand on the recipient at all times- it will keep them comfortable with your touch.
- Be aware of the recipient's ticklish spots, and stay away from them. Otherwise, you'll leave them more tense then when you started.
- If your hands are easily tired, or the thought of massaging someone with your actual hands creeps you out, buy one of these little massagers, from Koziol. They feel almost as good as the real thing (and much better than nothing!) $17, from Verbena.net

photo credit: borrowed from getty images.

Monday, November 16, 2009

Breakfast, Fast

I'm a firm believer that breakfast is the most important meal of the day. Not to belittle lunch or dinner. Or brunch. Or linner. Or snacktime. (I like them all.) If you want to get your day off to a good start, you've got to put some brain food in your gut. But, if you're like most people, you probably think you don't have time in the mornings to get any more than a cup of burnt coffee.
I'm here to help. If you plan in advance, and pick out the right things at the grocery store, you can have a delicious, nutritious breakfast in no time that leaves you with more than a case of the jitters and a charred taste in your mouth, for less than it costs to buy a stale corn muffin at the deli. The idea is to get your whole body and brain moving with foods that contain fiber, protein and enough carbs to kick your thinker into gear. Here are some of my favorite quick, easy breakfasts that provide the fuel I need to keep me feeling good and thinking on my toes.

At least until mid-morning snacktime.


Eight Easy Breakfasts


1. Whole-wheat english muffin with cottage cheese and honey.


2. Instant oatmeal with berries and soy milk.


3. Whole-wheat toast with almond butter and sliced banana.


4. Greek yogurt with bran cereal and blueberries.


5. Kashi Go Lean Crunch with milk or soy milk and strawberries.


6. Half-grapefruit with flaxseeds and a glass of kefir (drinkable yogurt).


7. Multi-grain toaster waffle with peanut butter and raisins.


8. Sliced cheddar cheese and apple or pear.


Gotta go- it's snunch time!

Photo credit: Real Simple

Friday, November 13, 2009

Y'All Ready For This?

Last Sunday's episode of 60 Minutes had a segment that made my skin crawl. No, I'm not talking about that old creep Andy Rooney complaining about ... whatever he was complaining about. I'm talking about the story they did on the very real possibility of computer hackers being able to disable the power grid, eradicate all bank records, or wreak havoc we haven't even imagined yet. That "tick,tick,tick..." never sounded more ominous. I mean, I live in Manhattan (where Godzilla could strike at any moment) and last year, my parents were evacuated from their house in California due to forest fires, so the thought of emergency preparedness has crossed my mind before. But now, in addition to worrying about the kind of disasters nature can throw at us, I am also now freaked out about the kind that malicious computer geeks can create. Great.
But, more importantly, it made me think about how truly unprepared we are in event of an emergency. Seriously, if the ATMs were out, the only cash I would have access to is the $32.00 in my wallet, and whatever change I can find floating around the bottom of my purse — hardly enough to barter for a Luna Bar on the post-apocalyptic black market. Not good.
So this weekend, I am resolved to equip our apartment in case we have to hunker down and put together an emergency "go bag" kit that will get JM, Skipper, and me through any disaster — man-made or natural — and I strongly suggest you do the same. I have compiled this information from the City of New York, Ready.gov, 72hours.org, and the ASPCA to be the most ultra-prepared I can be, but you should check out the individual sites, and those specific to your area (I'm not really going to stress too much about tornadoes, for example, so you may need to do your own research there).
I'm not suggesting we all become like those Y2K people who stored decades' worth of canned goods in their basements, but sometimes being a little uptight and ornery can be a good thing. Just ask Andy Rooney.

Get Your House In Order:

Keep in a safe and accessible place that all household members are aware of (but don't be tempted to poach from it, just because you want some raisins or need a band-aid for your blister — this is for emergencies ONLY):

• Water: At least three gallons of water per person, for drinking and sanitation (and more if you have pets). For reference, a large water cooler jug is 5 gallons.
• Food: At least a three-day supply of non-perishable food. Try to choose things you like, but that require no cooking or preparation. Try energy bars, dried fruit, nuts (but avoid very salty ones), peanut butter, crackers, canned juices and fruits and veggies, Gatorade, and GU. Include a can opener too, smarty.
Flashlight: You should have at least one in your home kit and in your "go bag" (as well as extra batteries), and one in the nightstand by every family member's bed.
• Phone: If you have a landline (and you should) a phone that doesn't require electricity in your home emergency kit.
Sturdy Garbage bags and Duct Tape: to maintain sanitation and to use to seal off windows and doors in the event of air contamination.
Moist towelettes: for personal sanitation.
Wrench or pliers: to turn off utilities
• Bleach and an eyedropper: For sanitation and water purification. When diluted nine parts water to one part bleach, bleach can be used as a disinfectant. Or in an emergency, you can use it to treat water by using 16 drops of regular household liquid bleach per gallon of water. Do not use scented, color safe or bleaches with added cleaners.
• Pillar candles and a lighter: Come on, you don't want to be stuck in the dark. Most of the websites don't actually suggest having candles in your emergency kit, probably because they don't want you knocking them over and creating another disaster. But just be safe and don't be an idiot about it, and you'll be fine. Which brings me to:
• Fire Extinguisher.

And If You Have Children:

• Supply of formula or baby food
.
• Children's versions of medicines.
• Books, games, puzzles or other activities.


In Your "Go" Bag:
Each Household member should have their own, in the event that you are evacuated from your home and must leave quickly.

• A Bag:
I suggest a backpack, or something else that can be carried easily.
• Food and Bottled Water: The same non-perishable items listed above, but try to stick with the lighter things, like dried, rather than canned fruits.
• Sturdy shoes, a change of clothes, and a warm hat.
Money. Make sure you have plenty of cash in a variety of denominations and a couple rolls of quarters (for using payphones or laundromats).
Lightweight Rain Gear.
Local maps: if the New World Order takes out the power grid, you probably won't be able to access GoogleMaps.
Documents: photocopies of each household member's driver's license, social security card and passport, insurance policies and cards, credit cards, bank account records, medical records and prescriptions, recent color photos of family members and pets for re-identification purposes, list of emergency phone numbers, in a waterproof, portable container. (Doubled-up heavy-duty Ziplock bags should do the trick).
• Radio: Battery-powered or hand crank radio and a NOAA Weather Radio with tone alert and extra batteries for both.
Flashlight and extra batteries: You should have these suckers stowed everywhere, but particularly in your bag.
Swiss Army Knife. Obv.
• Whistle: to signal for help.
Dust masks: a couple for each member of the family, to help filter contaminated air.
• Toothbrush and Toothpaste. Prescription Medications. Feminine Hygiene products. Extra Contact Lenses and Solution. Extra Glasses. I mean, it's not like you are going to be able to stop by Walgreen's on your way.
• Paper and Pencil. When don't you need one?
• First Aid Kit: It should contain the following.
- 2 Pairs sterile gloves
-Sterile dressings to stop bleeding
-Cleansing agent/soap and antibiotic towelettes to disinfect
-Antibiotic ointment to prevent infection
-Burn ointment to prevent infection
-Adhesive bandages in a variety of sizes
-Eye wash solution to flush the eyes or as general decontaminant
-Thermometer
-Tweezers and Scissors
-Petroleum jelly
-Aspirin or non-aspirin pain reliever
-Anti-diarrhea medication
-Antacid (for upset stomach)
-Laxative


Your Pet's "Go Bag":
• A Traveling Bag: or a crate or sturdy carrier, ideally one for each pet.
• Extra harness and leash
Pet's Records and Medications: Photocopies of medical records, vaccination history, adoption papers, and recent photographs of your pet and a waterproof container with a two-week supply of any medicine your pet requires (Remember, food and medications need to be rotated out of your emergency kit—otherwise they may go bad or become useless.)
• Blanket or large towel: Can be used as a bed, or for scooping up a fearful pet.
Supply of 3-7 days; worth pet food and extra water for your pet.
• Food bowls, and a can opener (if needed).
Pet first-aid kit and guide book (ask your vet what to include, or visit the ASPCA Store to buy one online).
• Toys and Treats.
Litter and disposable litter trays (aluminum roasting pans are perfect).


Some Additional Tips:
-Even though it's totally not fun to think about, being prepared today could save your life down the road.
-Check your kits a couple times per year (like the days Daylight Savings Time begins and ends), and swap out any medication or food that will expire.
-Make two "meeting place" plans with your family- one close to your home, and one (such as a library or community center) in another neighborhood.
-Designate someone out-of-state to be your emergency contact and coordinator: long-distance phone service is frequently restored before local service.
- Go to the following sites to learn more:
www.Ready.gov
www.72hours.org
www.aspca.org/pet-care/disaster-preparedness
www.nyc.gov (or your own local government's disaster information website)


photo credit: Houston Chronicle Online

Thursday, November 12, 2009

Let's Get Cracking

I once read that when a chef is applying for a job at a fancy restaurant, rather than being tested on something truly difficult, like a mille-feuille cake or a cheese soufflé, they are frequently asked to make a simple omelet. This is because it is believed that the omelet is so fundamental, that a person's entire cooking skills and style will be revealed during the 30 seconds of its preparation. This was good news to me, since I would probably run out of patience around the dixième feuille, and I have never even attempted a soufflé, but I have been preparing omelets since I was tall enough to reach the burners (that sounds bad, but it's true). But, like with everything, I wanted to know the right way to make an omelet, so I turned to the master, Julia Child. Here's what she told me:


In case you can't watch videos at work, or are a "just the facts, ma'am" type of person (in which case you probably wouldn't even make it to the troisième feiulle, Ms. Restless), here's the breakdown:
1. Melt a tablespoon of butter over medium heat in a non-stick skillet or omelet pan (Julia suggests about 7-8" diameter).
2. Whisk two or three eggs with salt and pepper to taste and about a teaspoon of water (I know - that surprised me, too!)
3. Pour the eggs into the pan. If the pan is the proper heat, the eggs will start to congeal and bubble immediately, but will not sizzle or pop too wildly (the butter should not burn in the pan, either).
4. Once a bubbly film has formed on the bottom of the pan (about 5-10 seconds), take the pan by the handle and start to vigorously shake back and forth over the heat, so that the runny part of the eggs slide onto the hot surface. (It helps to look at the video for this part, since I'm afraid my description of the action is falling a little short in painting the picture).
5. Continue to shake the pan back and forth for about 20 more seconds, until the eggs have formed a solid, but soft, mass at the far end of the pan.
6. Flip the omelet out of the pan onto the plate and top with a little butter (hey, don't question Julia), and chopped herbs.

If you wish to add cheese or other fillings to the omelet, have them prepared before you start cooking the omelet, and add them to the pan between steps 3 and 4. And then, once the omelet is plates, sprinkle more on top, if you wish.

Another thing that the eagle-eyed among you may have noticed in the video is how Julia nonchalantly cracks the eggs with one hand- actually, one in each hand- ambidextrously! The minute I saw her do it, I decided I needed to add that skill to my repertoire, if only to impress my husband now and then (or in case I am ever in a contest where I have to cook with one arm tied behind my back). It just takes a little practice to figure out just how hard to strike the eggs without getting shell pieces in the bowl, but otherwise, it's actually quite easy. Here's a video to help you master the technique. This guy's a little intense (you have my permission to skip the practicing-with-golf-balls nonsense) but he illustrates the method pretty well.


So, whether it be for an impressive weekend brunch with friends (made all the more impressive when you nimbly master the one-handedness), or a super-quick, nothing-in-the-fridge weeknight dinner, go forth and get your yolk on.

Wednesday, November 11, 2009

Silly-houettes, Part 2

I know that maybe the whole silhouette thing is getting a little played-out on this blog, what with this post, and this post, and my banner... But before I can put the whole topic to bed once and for all, I feel compelled to show the full how-to and results of my own little project.
For the how-to, I'll show you how I made Skipper's silhouette. It's one in a series of silhouettes we are doing for our salon wall (a topic for a future post) of all of our family and friends. I still think that it's such an easy project, and makes for a really sweet and personal decoration or gift. For ours, I opted for the classic black-and-white look, but I also made one of my brother, sister-in-law and their baby in pastels that hangs in her nursery. And I love the look when done in bright colors or even patterns.


Step 1: Take a cute picture of your little friend in profile. Open the photo in Adobe Illustrator. For the low-tech version of these instructions, click here.


Step 2: Using the pen tool on a second layer, trace the outline of your friend. Print the outline on plain paper and scale it until it perfectly fits your frame. Reflect the image, so it prints the opposite side of how you want it. Print it on the final paper you intend to use in the real project.


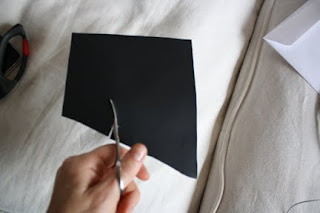
Step 3: Using small sharp scissors, cut out the silhouette, moving slowly and staying exactly on the lines.


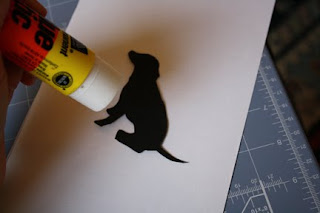
Step 4: Use a glue stick (remember to put the glue on the "wrong" side), to adhere the silhouette to the background paper you are using.


Step 5: Place the glued paper in a heavy book to dry. The pressure of the pages will prevent the paper from puckering or peeling away. If you use a standard glue stick, it should be dry within 20 minutes.


Step 6: Place the silhouette in your frame of choice, and hang up your new unorthodox family portrait proudly in your house.

There. It's out of my system.

Tuesday, November 10, 2009

A Souperior Supper

I have a real love/hate thing going with autumn. On the one hand, it means summer is over, and I have to wear a coat and gloves, and the hectic holidays and dreary days of winter are closing in. But on the other, the leaves are pretty, we can use our fireplace, and SOUP! I know most people don't get all that excited about soup, but if they had the right soup, I think they would. And, trust me, my mom's Pistou (that's french for "pesto") soup is the right soup. It's a light vegetarian soup, with a special pesto side that gives it a real kick in the broth. And it's got enough beans, veggies, and pasta in it to make for a hearty and very satisfying dinner (even after you've been out raking leaves all day). It's beyond delicious.
One year when I first moved to New York and was desperate for home cooking, I made my mom and dad make a huge batch of this, freeze it, and drive all the way from Michigan with it in the trunk. When they got here, the container they brought it in wouldn't fit in my freezer. It didn't turn out to be a problem, though- we ate it all in one weekend.
I'm not so dependent (or demanding) now that I have the recipe, and on a fall weekend, I love to gather up my veggies (including the things wilting in the crisper drawer and shoved to the back of the freezer), and whip up a huge batch myself. It's quick and easy to make (only about 10 minutes hands-on time) and it freezes surprisingly well, so I know I'll have delicious soup ready when I'm too busy with other things to make dinner. I like to serve (and by "serve" I mean "eat") it with a couple slices of crusty buttered rosemary toast. Yummmm. Nevermind - you win, fall. It's just a love/love thing.

What You Need:
For the soup:
1 potato, diced
1 carrot, diced
1 onion, chopped
1 lg. can chopped tomatoes
1 can great northern or navy beans
salt and pepper
1 zucchini and/ or yellow squash, chopped into pieces
5 oz fresh green beans, cut into bite-size pieces, or 1/2 frozen package green beans
1/2 package small pasta shapes (we use broken up spaghettini, but rotelli, ditalini, etc. are good)
1/2 package frozen tiny peas

For the pesto:
1 small can tomato paste
1/4 cup of olive oil
big bunch of fresh basil
2-3 cloves of garlic (to taste, you can even add more)
1/4 cup parmesan cheese (shredded)


What You Do:
1. Put the potato, carrot, onion, tomatoes, beans, and salt and pepper (to taste) in a large soup pot. Cover with 5 cups water or vegetable broth. Bring to a boil, then cover and reduce to a simmer for 20 minutes.


2. Add zucchini or squash, green beans and peas, cover and simmer for another 10 minutes. Add pasta and more water, as needed, and allow to simmer for another 10 minutes.


3. Make the pesto: Combine the tomato paste, olive oil, basil, Parmesan cheese, and garlic in a blender or food processor, or use a hand blender in a bowl, like I do. Blend until well combined (make sure there aren't any huge clumps of garlic).


4. To serve, ladle the soup into bowls, and top with a tablespoon of pesto (or more, if you don't have a hot date, and don't mind a little garlic breath), and a little Parmesan cheese or fresh basil. Enjoy the season.

Monday, November 9, 2009

Glass Dismissed

When I was growing up, I was a total bowl-cutted, overall-ed, tomboy bruiser. And my best friend, Chloe, was a graceful, cherubic, feminine ballerina. It would have been enough to make me very jealous, except that I had one big advantage over her: Despite her elegance in a leotard, Chloe was a real klutz. She tripped, she dropped things, and rarely a meal would go by when she would not accidentally spill her drink all over the table. One Halloween, she even backed into a candle and lit her gorgeous long, wavy, hair on fire (just one of the advantages of the bowl cut).

But even if you are not naturally a bull-in-a-china-shop type, you've been there: an errant elbow, a poor grip, a too-tippy stack of dishes... Whatever the cause, there are few sounds universally more unpleasant than that of something fragile (i.e. your china teapot) connecting with something hard (i.e. the ground) and shattering into a million pieces. The blow is two-pronged: first the feeling of loss, and then the overwhelming, dangerous mess all over your floor. But, if you keep your head, at least the cleanup doesn't need to be a painful experience. Here is the right way (no brooms!) to clean up broken glass or china quickly and efficiently.

And FYI, Chloe has grown up to be a graceful, beautiful woman (the hair grew back), who agilely balances her cherubic baby in one arm while arranging flowers with the other (with nary a drop of water spilled). But she's such a good friend that I've decided to forgive her for it.

How to Clean Up Broken Glass
1. Protect Yourself: First things first: Go put on rubber gloves and shoes. I don't care how big of an Annie Lennox fan you are, no one likes walking on, walking on, broken glass. If there are any children or animals in the area where the glass was broken, check them for cuts or injuries and immediately remove them from the area until the mess is cleaned up.
2. Remove the Big Shards: Very carefully use your gloved hands to pick up the biggest shards and place them in a paper or double-layered plastic grocery bag. Be sure to check the floor as far as fifteen feet away from the point of impact- you'll be amazed at how far the glass will fly.
3. Vacuum: Using the hose attachment of your vacuum, suck up any remaining fragments you can see. Check under nearly furniture, as well. Don't, under any circumstances, use a broom -- tiny shards can get stuck in the bristles and come loose later, making an even bigger mess. If you must defy me and use a broom, throw it away afterwards and get a new one.
4. Get the Tiny Pieces: There is likely to be glass dust and tiny pieces right near the point of impact. Press a soft piece of bread against the ground- it will pick up and hold any tiny stray pieces. Then, to be extra sure, use damp paper towels to wipe down the whole area, the vacuum hose, and the soles of your shoes. Place the paper towels in the grocery bag, tie it up, and put it in the garbage. Also, remove the vacuum bag and place it in the garbage, and take it out of the house.

There. Just because a glass may be broken doesn't mean your heart needs to be, too.

Friday, November 6, 2009

Tavel Tip #001: Dog Sense

Here's a quick travel tip for when you are wandering around lost in a strange city (or just a strange part of the city you live in) and can't tell the locals from the other lost tourists: Look for a person walking a dog. In New York, at least, they are a dime a dozen, and, chances are, they live in the neighborhood and will be able to give you good directions. Skipper and I get stopped all the time, and consider ourselves regular Manhattan tour guides.
If you don't see someone with a dog, look for a jogger, who also will be likely to know the streets. However, (especially in New York), be prepared for a curt response - a jogger is far more likely to be annoyed by the interruption than that nice dog person.

Thursday, November 5, 2009

A Real Snoozefest

While I like to think of myself as being talented in a lot of arenas, I am, by far, most skilled in the art of sleeping. Ever since I was a child, I have been able to fall asleep anywhere -- on the floor of an airplane, sitting upright in a chair, and once, famously, in broad daylight on a pile of ropes on the Nantucket ferry (I awoke with rope imprints embedded in one side of my face, and a sunburn on the other). And I'm not just good at sleeping, I am passionate about it. I figure if you are going to spend six to ten hours of each day doing something, you should probably enjoy it (that goes for your job, too, but that's a topic for another day).
But I am aware that not everyone has my innate talent for sleeping, and for some people it is actually a major point of stress and challenge in their lives (hence all those drugs that make people sleepwalk naked around their cul-de-sac). And not getting enough sleep can have disastrous consequences for your health, beauty, productivity, and state of mind. Sleep loss has been linked to "a wide spectrum of medical conditions including cardiovascular disease, arthritis, diabetes, certain cancers, and obesity "*, not to mention wrinkles and those ugly bags under your eyes. I always feel sorry for people who brag about how they can "get by" on just a few hours of sleep per night, since they are likely headed for the "big sleep" sooner than they would like. So, for those of you who are a little somnolently-challenged, here are some tips from a master sleeper for how to get the shut-eye you need and so richly deserve.

Make Your Bed (Fabulous): Just because I can sleep anywhere, doesn't mean I curl up on a bed of nails each night. In fact, I pay special attention to making my bed a dreamy (literally) place to be. A good mattress, soft sheets, warm blankets, and downy pillows can make a huge difference in how well you sleep each night. You don't have to splurge on the 1,000,000 thread-count sheets, but don't totally cheap out- this is an investment in your health and happiness. For my tips on how to make a great bed, click here.

Set the Mood: Studies show that people sleep best in a cool room, in a warm bed. So turn down the thermostat (Al Gore and the polar bears will thank you for this, too), and pull up that extra blanket. Light can be a source of sleep disturbance, too, so invest in good light-blocking curtains, and a nice, soft sleep mask. If you are sensitive to sound or live on a busy street, try Hearos ear plugs, or run a fan for white noise while you sleep. Reserve your bedroom for sleep, dressing, and, um, intimacy, only. Keep the TV in the living room, and refrain from bringing work, computers or anything that might be stressful into that space.

Exercise and Eat Right (But Not Right Before Bed): People who exercise regularly sleep much better than those who don't, but that doesn't mean you should do your whole Tae Bo video right before bed. Leave at least two hours between exercising and going to bed. Likewise for eating- being sated by a healthful dinner is good, but a heavy, greasy or spicy meal can cause indigestion (and really weird dreams). Finish dinner a few hours before turning in, and, if you are hungry before bed, eat a banana, which contains potassium and magnesium - natural sleep aids. And avoid caffeine and alcohol, too, Captain Obvious.

Easy Does It: Don't expect your brain to be able to from sixty to zero in ten seconds. Spend the last hour or so before going to bed refraining from anything too stimulating or mentally stressful- don't pay bills or check your email or get in an argument with your spouse. Instead, take a soothing bath or do some light reading.

Sleep Supplies: try taking Schiff Knock-Out vitamins before bed. They are all-natural, really work, and won't leave you drowsy or groggy in the morning. Bring a glass or bottle of water to your bedside table each night, so if you wake up thirsty in the night you can take a sip and fall right back to sleep without getting up and trekking to the kitchen. Keep a notepad and a pen next to your bed for those random thoughts and ideas that pop into your head when you are dozing off. Jot them down to deal with in the morning and you'll be able to put them out of your head and relax.

Sleep tight!

* ScienceDaily.com

Evidence that I am a sleeping prodigy. On a bench on a boat in Greece, 1985.

Wednesday, November 4, 2009

Extraordinary Measures

In the process of renovating and decorating our apartment this past year, I have always tried to remember to carry a measuring tape with me whenever I go out on apartment-related errands. But sometimes, my memory not being what it used to be, I simply forget to bring one along, or, while out for entirely unrelated purposes, I unexpectedly stumble upon a rug store that requires browsing. Luckily, I've learned that there are makeshift measuring tools all around us (and on us), if you only know where to look. So next time you just happen to see a gorgeous armoire in a thrift store window that you aren't sure will fit through your front door, or an antique silver picture frame at a flea market, but can't tell what size photo it will hold, use one of these handy tricks for sizing them up.

The length of your arms: Unless you are crazily disproportionate (I'm talking about you, Michael Phelps), fingertip to fingertip, the length of your arms across your chest is almost exactly the same as your height. For instance, I am 5'9" tall and my arms are, too (we really are well-designed creatures -- I think that is what Da Vinci was trying to get across in this little doodle). This comes in handy when trying to figure out the height of a curtain rod, the length of a vintage tablecloth, and a million other things.
The length of your foot: Measure the bottom of your shoe and remember the length. I wear a women's size 8.5 shoe, which is almost exactly 11" long. Walking, heel-to-toe with about one inch between them, I can fairly accurately measure out the length of something, in feet (literally!). I have used this trick to measure the square-footage of a room or the size of a carpet. Incidentally, if you are measuring something you can't walk on, this measurement should be the same as the distance from your elbow to your wrist.
The length of your stride: My natural stride is about 2'. To measure yours, take a few natural steps, then freeze. Use chalk to mark the tip of the toe of your back foot and the tip of the toe of your front foot and measure the distance between them.
Pocket change: The diameter of a quarter is exactly one inch. The circumference is exactly 3" (starting with Washington's nose pointed straight down, roll the edge along a surface until he faces down again). A penny is exactly 1/16" thick. That means that a stack of pennies can be used for precise measurements of less than an inch.
A dollar bill: A US dollar bill is 2.5" x 6". It can also be wrapped around things that are round or curved to measure them.
A credit card: A credit card is almost exactly 2" x 3.5". The distance from the top edge to the bottom of the magnetic strip is .5".
For the truly committed: I've never gotten this intense, and I don't wear a belt everyday, but for those who do, you can also mark off inches on the inside of your everyday belt. Although, that might be depressing for those with expanding waistlines.

Try to remember these simple tips, and you'll always know how you (and that lovely garage sale lamp) measure up.

Tuesday, November 3, 2009

Thanks A Million!

Time flies when you're having fun, and never has that been more clear for me than when I realized that today is the one-year birthday of this blog! It's been a total pleasure sharing my musings, but it wouldn't be nearly as enjoyable if there were no one reading. Thank you so much for visiting with me every day and letting me boss you around. Your readership means the world to me. Here's looking forward to another year of randomness and fun!

In keeping with today's theme of my gratitude to you for reading my blog, this post is going to be about thank-you notes. It may seem like an obvious topic for this blog, and you may be wondering why it has taken me a whole year to get around to it.
The truth is that I have been avoiding this subject because I don't like hypocrisy, especially my own. While I truly believe in the importance and merits of writing thank-you notes, I admit to being somewhat epistolarily challenged. As a child, my mom had notecards printed for me that said "Lily thanks you so much for _______. And also says:_________." And still I struggled. Even once I get the note written, I never seem to be able to find a stamp or I misplace the address. It took me over a year to write my wedding thank-you notes. So now that I have confessed completely why I am not qualified to dispense advice on this topic, I will do exactly that. The thing is, I know exactly what I should do, I just rarely manage to do it. But let's make a deal: You overlook my poor thank-you note record in the past, and I'll do my best to take my own advice and be better about expressing my gratitude in a timely manner. Starting here: Thank you so much.

1. Know When to Write: You should always write a thank-you note when someone sends or gives you a gift or flowers (the exception is very inexpensive gag gifts). You should also write a note any time someone does something kind for you: hosting a party in your honor, inviting you as a guest to a special event, hosting you overnight in their home or writing a recommendation for you. It is not required, but it's smart, to write thank-you notes to interviewers or people meeting with you regarding your career. An emailed thank-you is okay in some cases, but it simply cannot replace a real, paper note with your handwriting on it. On the plus side, you don't have to write a note to anyone who lives under the same roof as you (although a sweet post-it on their pillow is a nice gesture) or when someone gives you something as a gesture of their own thanks ("thank-you-for-thanking-me") -- no note is required when someone brings a bottle of wine or flowers to a dinner party you are hosting, for example.
2. Get Organized: Buy some pretty stationery that you really like (see below for some of my favorite options)- having stationery you love is a real motivator to send a note. I recommend flat or folding cards no bigger than 5 x 7 (if the card is too large, you will feel like you have to write a longer note). Put it in a special drawer in your desk, along with some nice pens, your address book, return address labels and stamps. If you have everything you need together in one place, it's so easy to sit down and quickly jot a nice note while the kindness is still fresh in your mind. Slap a stamp on it, and boom, you're done.
3. Act Fast: Try to write the note within 72 hours (three days) of the receiving the gift/ kind act. It's fine to send a note later than that (better late than never), but it's more likely to slip your mind. And if you wait too long, you'll have to write a longer note, and it may be harder to think of what to say. If you are writing notes for a wedding or baby shower, have someone else make a very clear and detailed list of who gave you what while you open gifts. You technically have about three months to get the notes done (not a year, Lil, yeesh), but, no matter how busy you are with other things, try to make the notes a priority, or you can quickly become overwhelmed.
4. Be Specific: A good thank-you note specifically mentions the gift or kindness received ("Thank you so much for the awesome Knicks tickets"), and goes into detail about it's use ("They were the best seats we've ever had- we really felt like we were a part of the action.") One exception to this rule is in the case of monetary gifts- don't mention the exact amount ("Thank you for the $100"), instead say "Thank you for your generosity" and mention how you plan to spend it: ("Jim and I have been saving up for a new car and we are truly touched by your kindness. We can't wait to take you for a spin!")
5. Be Sincere: You don't have to lie about loving every single gift you receive. Some faux-enthusiasm can come across as saccharine and false ("We absolutely adore the citrus reamer! How did you know?!"). If you legitimately don't like something, you still need to write a note, but you are better off expressing your gratitude at the thoughtfulness that went into the selection, rather than the gift itself ("Thank you so much for thinking of us"). And remember, when someone feels like you truly appreciate their kindness, they are so much more likely to keep being kind. Which is how writing thank-you notes makes the world a better place, one envelope-lick at a time.

Top row: Pink monogramed stationery, from finestationery.com; Flourished personal stationery, from Cambria Cove; Letterpressed floral notecards, from Carrot & Stick; Notepaper letterpressed thank-you note, from Kate's Paperie. Bottom row: Colorful "Thanks" note, from Kate Spade; Lemon-motif stationery, from iomoi; Brightly colored thank-you card sets, from Kate's Paperie; Carnival-stripe personal stationery, by Kate Spade from Crane's.

Monday, November 2, 2009

Saving Face

Turning up the thermostat to accommodate the change in the seasons. Halloween makeup. A few too many cocktails. Sweaty long runs. Baking in the sun during last weekend's trip to Vegas. These are all crimes I have recently committed against my skin, and it's beginning to show. It's definitely time I do something nice for my face, but I'd like to do it without simultaneously doing something mean to my wallet. What I'm saying is, I think it's time for an at-home facial, people. While a DIY facial can't compare to the spa version in terms of pampering, it CAN have the same aesthetic benefits, for a lot less cash. So put on your robe, turn on some whale-sounds music, and dim the lights. It may not be a real spa experience, but it definitely beats an acne attack.

Here's what you need:
Your favorite cleanser
Exfoliating scrub
A toner
Warm water and a washcloth
Clay-based or cream facial mask (based on skin type)
Basic moisturizer

Here's what you do:
1. Cleanse: Use a headband or wrap a towel around your head to keep your hair pushed away from your face. To get started, use your favorite facial cleanser to remove any grease or dirt from the surface of your face (see below for my picks). In case you have never seen a Clean N' Clear commercial, the proper way to wash your face is to first dampen it with warm water. Then rub a nickel-size dollop on cleanser between your fingers, and massage it into your face. To rinse it off, splash your face with warm water until all of the soap is removed. Pat dry with a clean towel.
2. Exfoliate: The next step is to remove and dead, dull skin cells. Dampen your face again, and massage a gentle exfoliator into your skin. Make sure you focus on the areas where you are prone to break-outs and blackheads (like your jawline, forehead and nose). Rinse and pat dry.
3. Tone: Toner is an oft-overlooked, but important facial product. The toner removes any cleanser residue, and really freshens the skin. You can use good old witch hazel, or one of my suggestions below. Pour the toner onto a clean cotton swab and rub over your face.
4. Steam: This is where you really sock it to any gunk that might be built up in your pores. Boil a pot of water over the stove. Add chamomile tea bags, if you like, and place your face over the pot, tenting with a towel, for about five minutes. Pat dry.
5. Mask: A clay-based mask will literally suck the dirt and grease out of your face. Apply liberally to the skin on your face and neck, but avoid your eye area. Try one of my faves below, or you can mix up a gentle mask in your kitchen using 3 tablespoons oatmeal, 1 egg white, and 1 tablespoon baking soda. Leave on for 10-20 minutes (you can put cucumber slices over your eyes and take a nap, if you want), then rinse thoroughly, and pat dry.
6. Moisturize: The last, but arguably most important step, is to apply your favorite moisturizer to your face and neck. Ahhh. You glow, girl.

My picks: Top row: Fresh Soy Face Cleanser, $38; Cetaphil Gentle Skin Cleanser, $11; St. Ives Apricot Scrub, $4; Aveeno Skin Brightening Daily Scrub, $6; Burt's Bee's Garden Tomato Toner, $11; Neutrogena Alcohol-Free Toner, $8.
Bottom Row: Lush Mask of Magnaminty, $11; Freeman's Purifying Facial Clay Masque, $4; Olay Total Effects moisturizer, $18; La Roche-Posay Toleriane moisturizer, $20.